Setup
This tutorial is the prerequisite to use all the features of the Platform. It covers basic connectivity (UI & SDK) and the steps to create an project and an environment.
Prerequisites
- Python 3.9 or higher is required to be installed on your computer.
- We strongly recommend the use of Google Chrome browser to use the UI of the platform.
There are 2 ways to access the platform:
- With the Python SDK, with scripts or command line
- With the web interface, in a browser
You will need both ways to create complete workflows.
Project & Environment creation
Please, follow the link that was provided to your Platform and connect yourself using your prefered connection method.
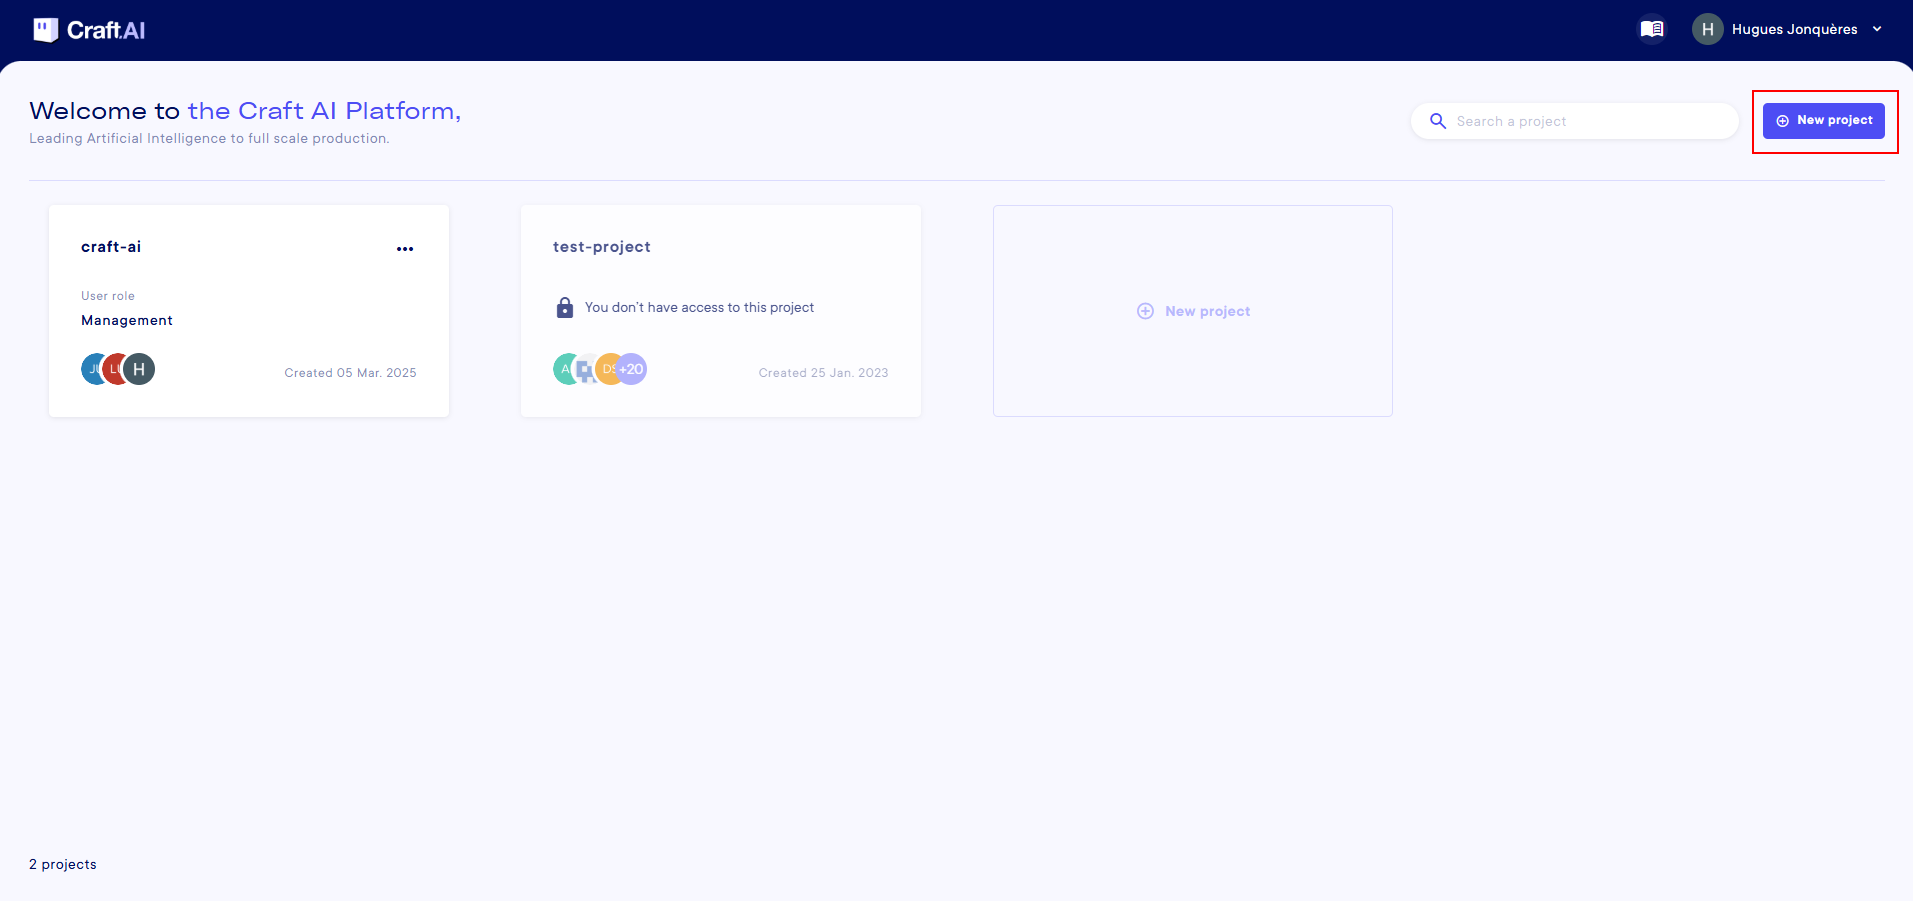
First, you need to create a Project. In the UI, when you arrive on the main page, you have a button in the top right corner to create a "New Project".
You need to fill 4 main parameters to create a Project. Two of them are filled by default, Organization & Python version.
You just need to choose a Project name and to select the folders the platform will access. Set it to / for now (you need to click on the + icon or press Enter).

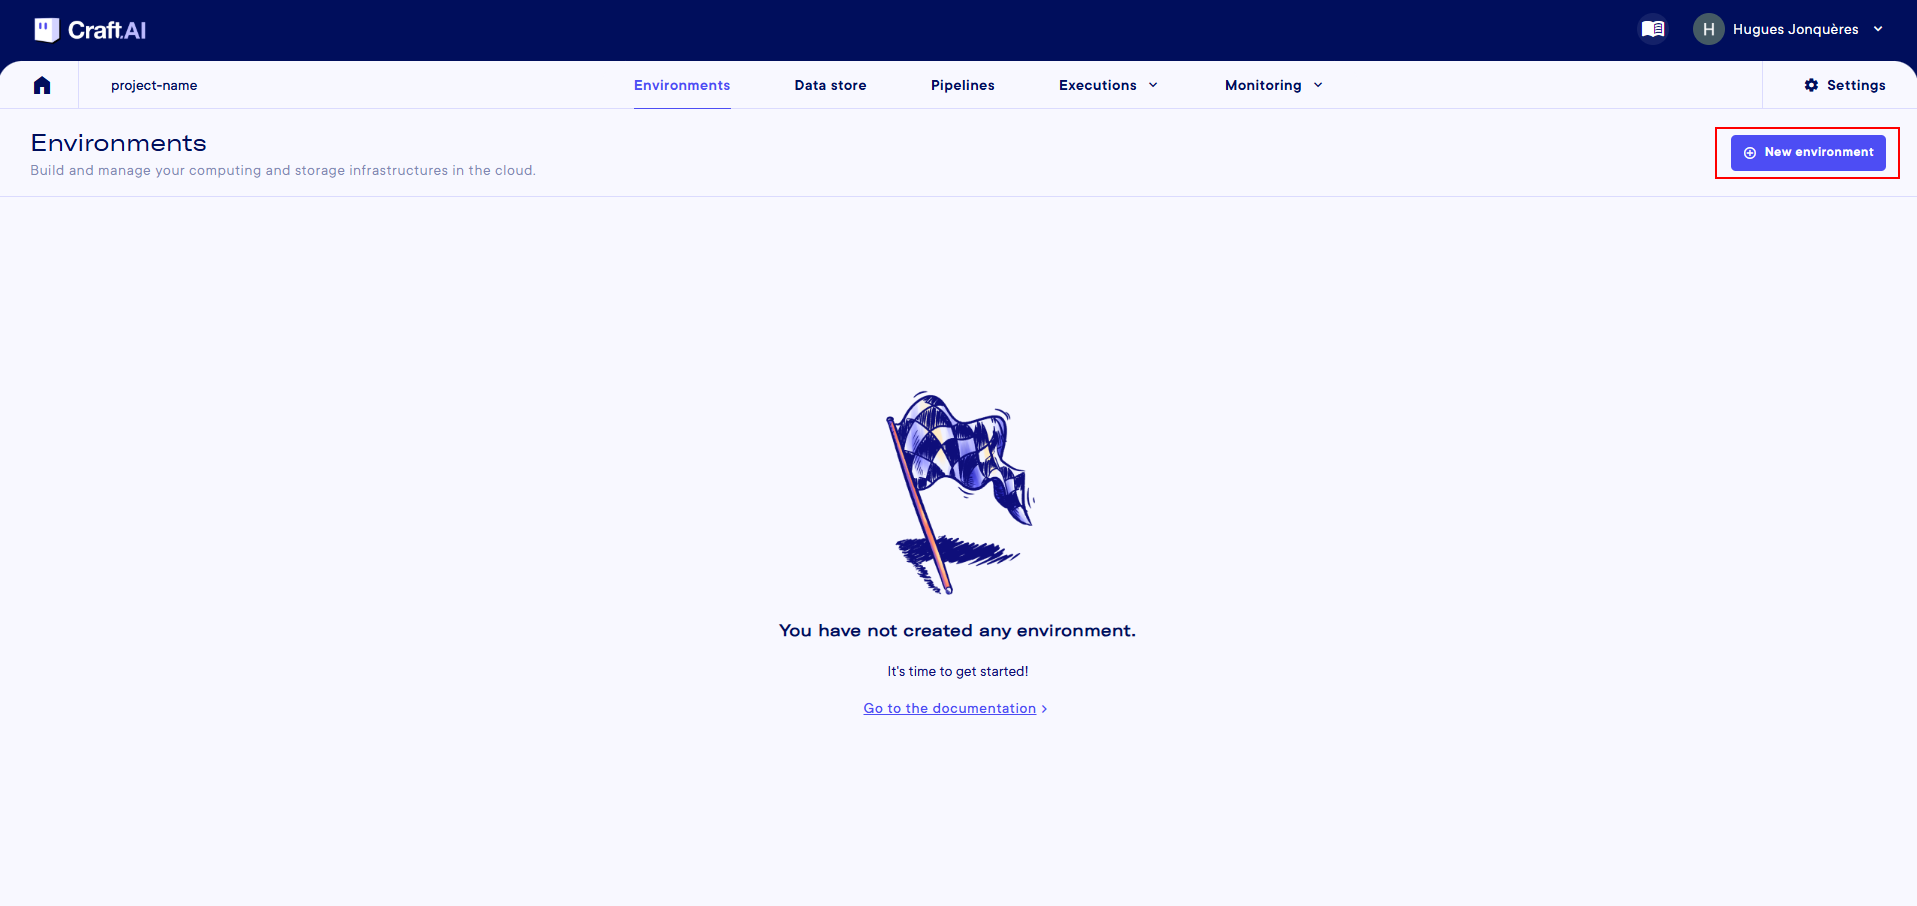
Then, once inside the project, you can create an environment. Click on the "New environment" button on the top right corner.
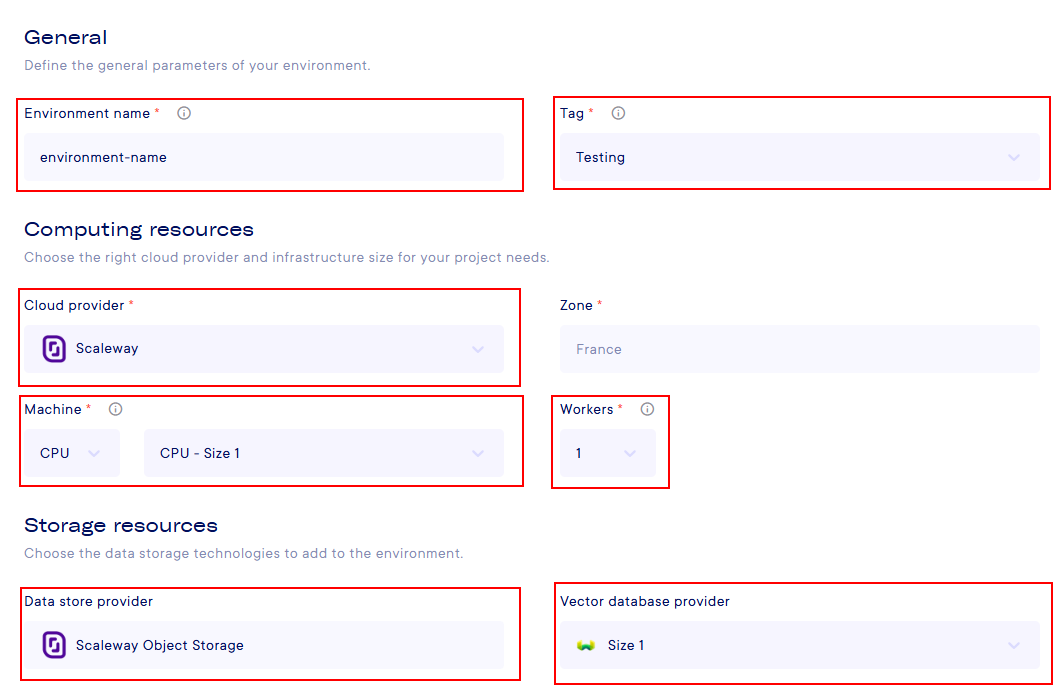
You need to fill :
Environment Name: your choiceTag: TestingCloud Provider: ScalewayMachine: CPU - CPU Size 1
You can leave every other parameter as default for this tutorial.
Once you click on "Create environment", you will see the environment being created. You can refresh the page to check the status. It takes around 5 minutes for the environment to be created and ready to use.

Initialization of Python SDK
To initialize the SDK, you need to install the SDK.
You need to find two information :
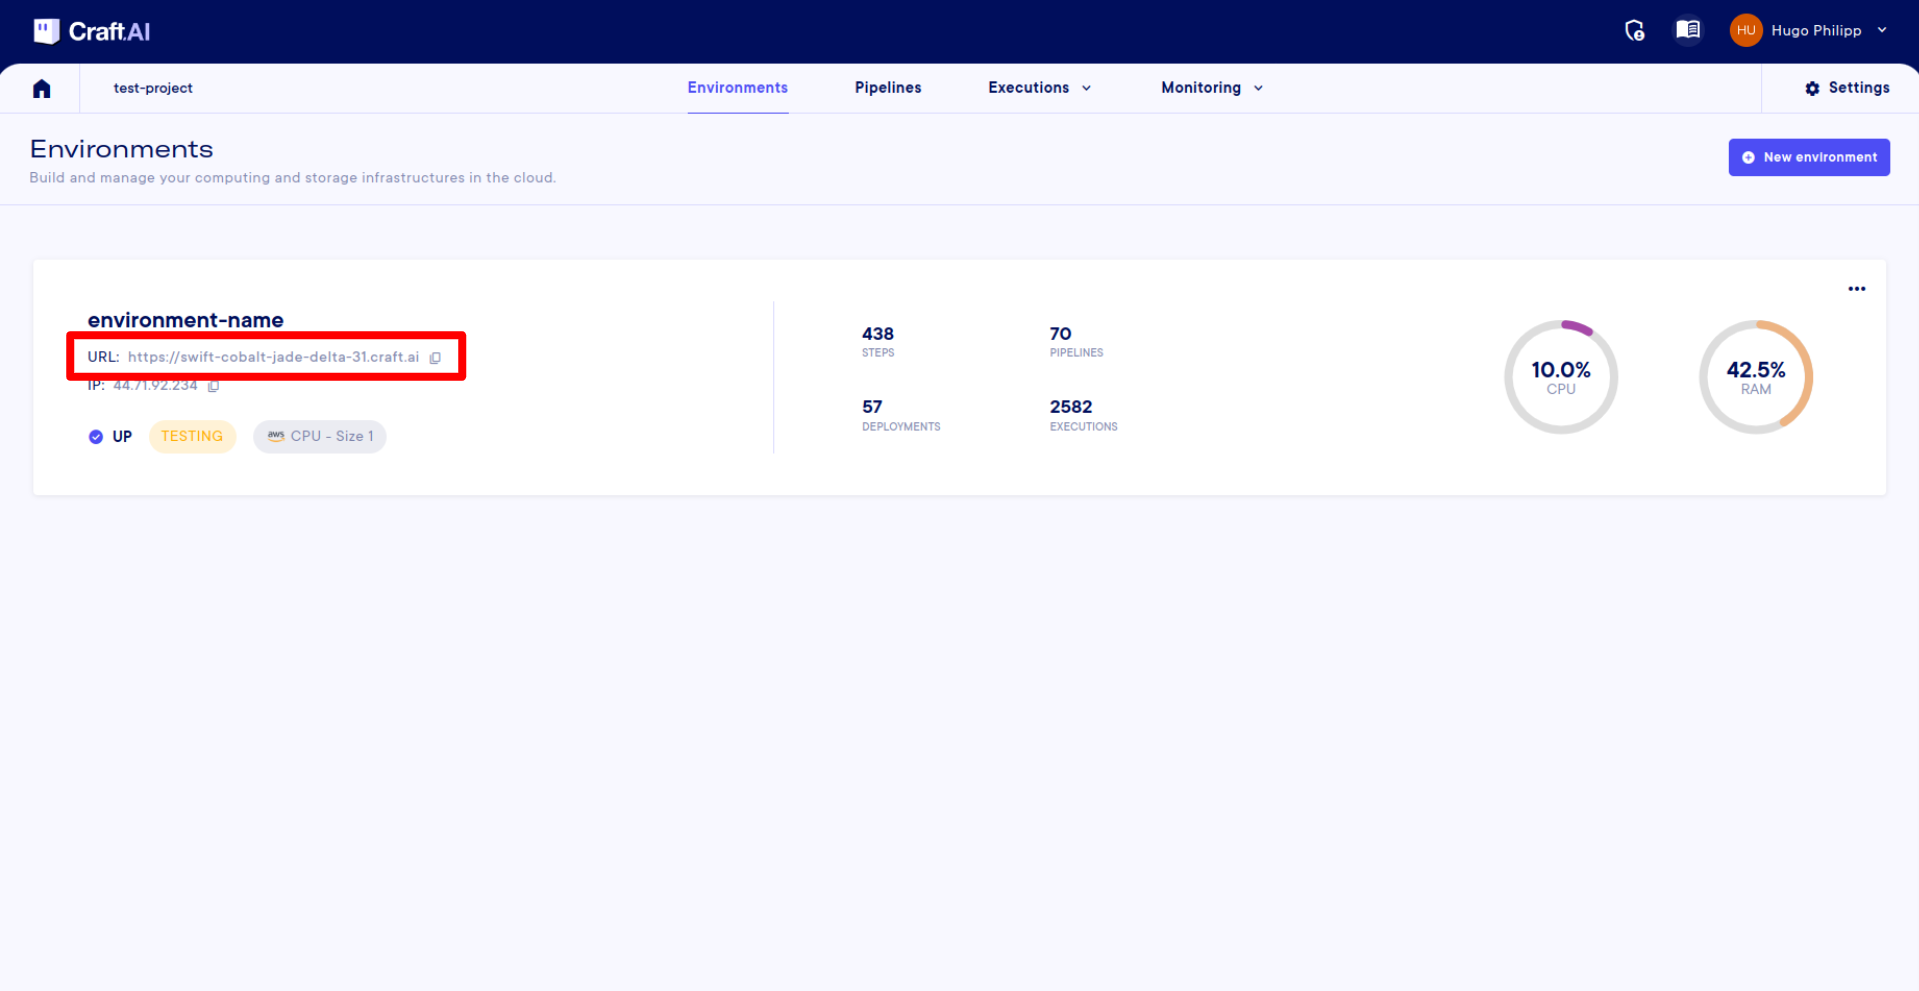
MY_ENVIRONMENT_URL : You can find this URL on the Environments page in the UI. The Environment URL is NOT the address of the page in your browser.
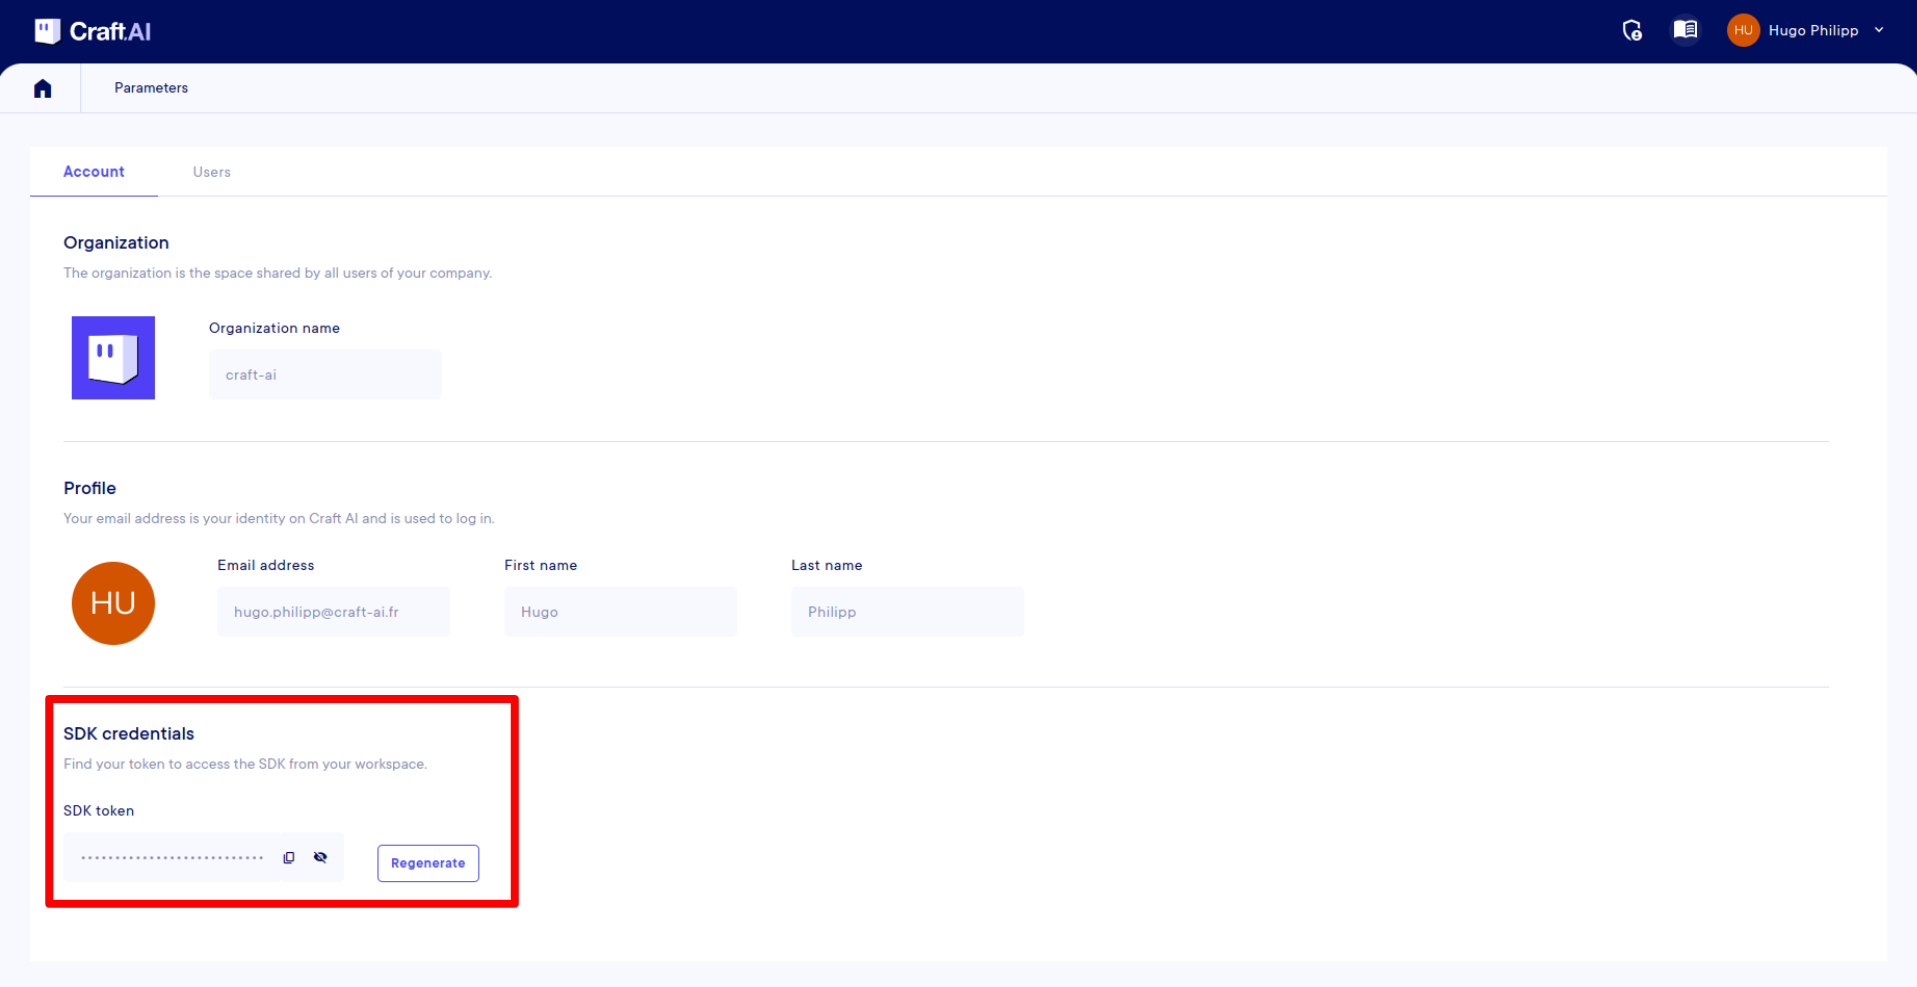
MY_ACCESS_TOKEN : On the UI, click on your name in the top right corner, then go to the “Parameters” page. There, you can generate and find your SDK token at the bottom. The SDK token is strictly personal. You must keep it confidential.
And to set the value of environment_url to your environment URL instead of MY_ENVIRONMENT_URL and sdk_token to your access token instead of MY_ACCESS_TOKEN in the following script:
from craft_ai_sdk import CraftAiSdk

sdk = CraftAiSdk(
    environment_url="MY_ENVIRONMENT_URL",
    sdk_token="MY_ACCESS_TOKEN"
)
Set up your credentials with a .env file"
A good practice would be to create a script that contains the setup of these 2 local environment variables. For example, you could create an .env file. We strongly recommend doing this part.
- Install relevent python packages
- Create a .env file.
- Execute the following Python code to set up SDK Python object.
import os
from dotenv import load_dotenv
from craft_ai_sdk import CraftAiSdk

load_dotenv()

sdk = CraftAiSdk(
    environment_url=os.getenv("CRAFT_AI_ENVIRONMENT_URL"),
    sdk_token=os.getenv("CRAFT_AI_ACCESS_TOKEN")
)
Success
🎉 Well done! You’re ready to execute your first code on the platform!